![]()
![]()
![]()
![]()
![]()
|
| Please Support our Sponsors |
 |
 |
 |
||
 |
|
 |
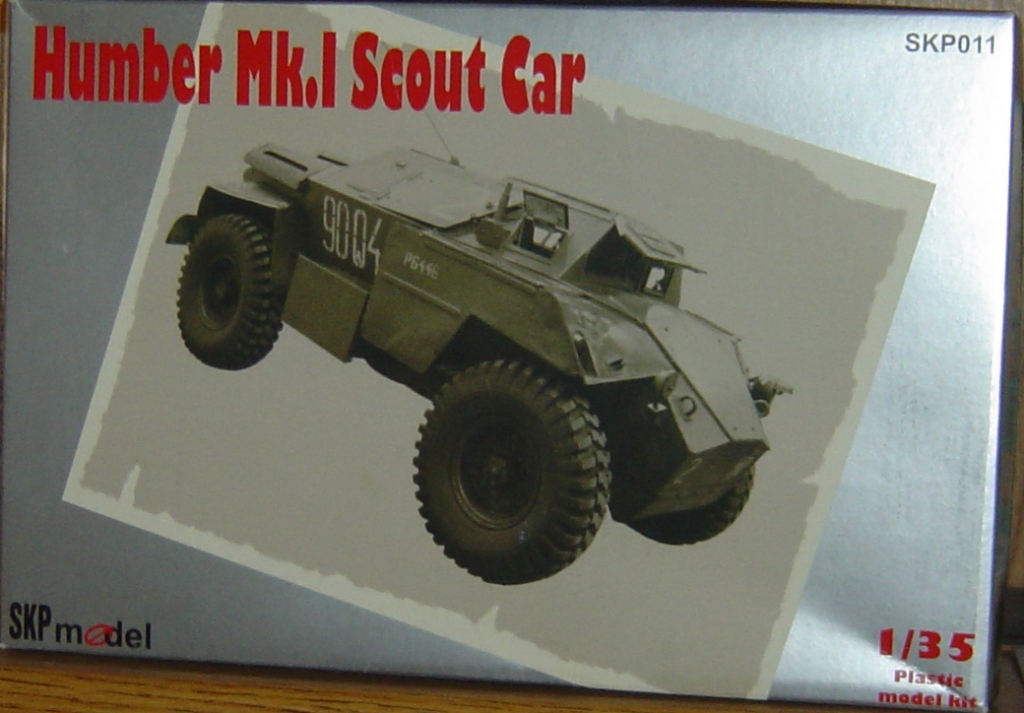
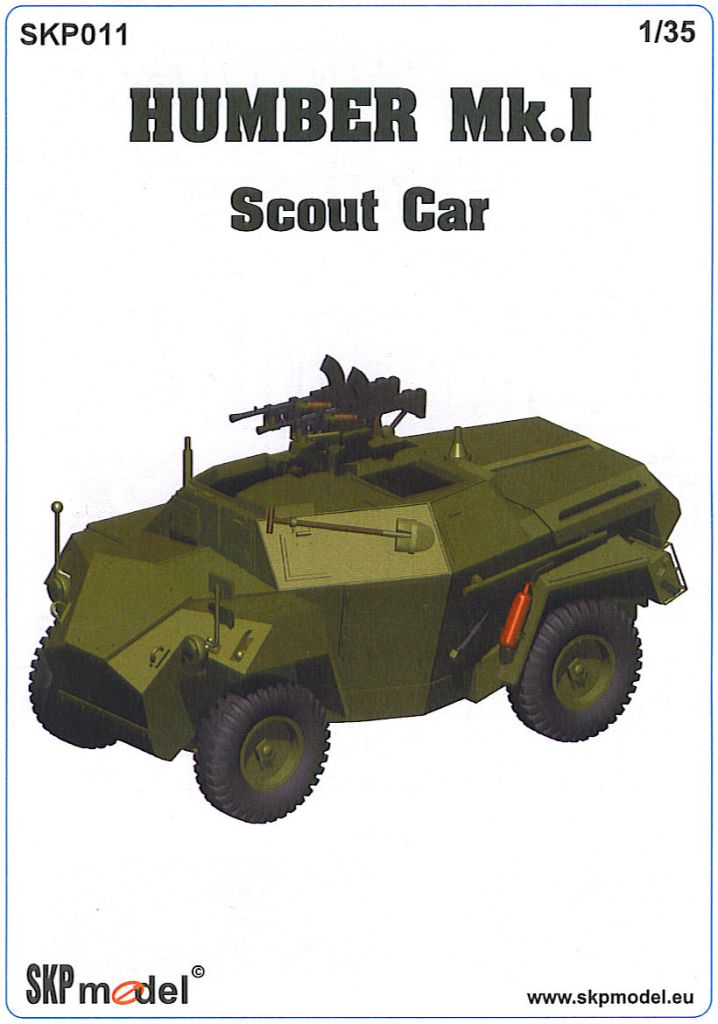
1/35 SKP Model Humber Mark I Scout Car
Kit Review
By Patrick Keenan - Aurora, IL USA

Basic Item Information
|
Item |
Humber Mark I Scout Car |
|
Stock Number |
SKP 011 |
|
Manufacturer |
SKP Model |
|
Scale |
1/35 |
|
Medium |
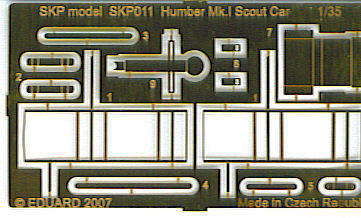
Injection Molded Plastic & Brass Photo-Etch Detail Pieces |
|
Kit Contents |
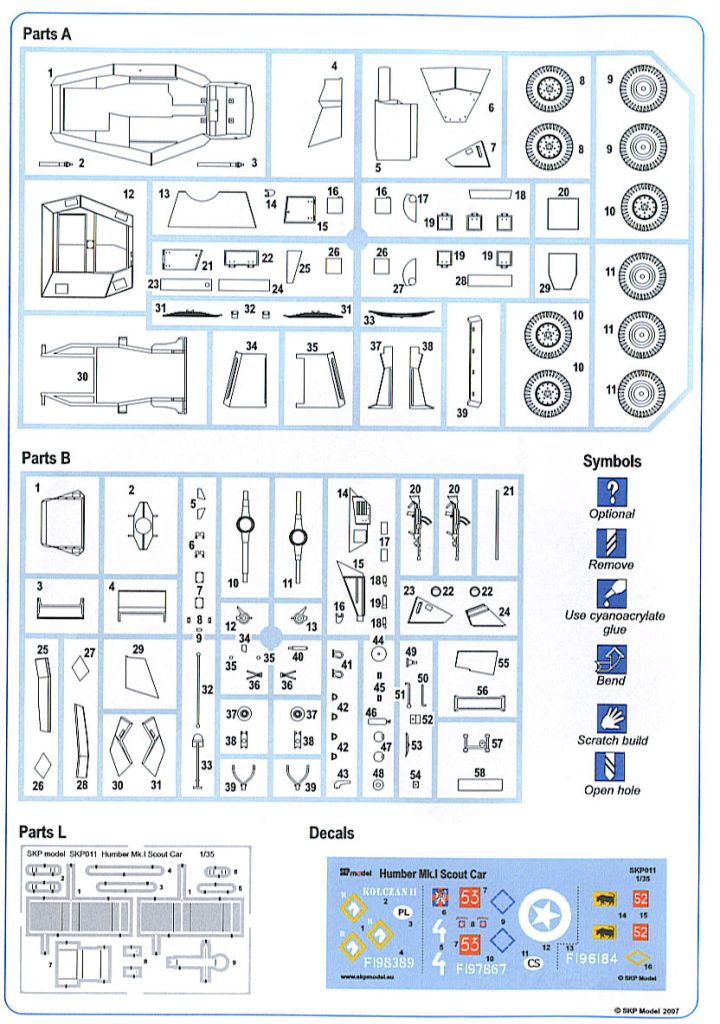
141 Pieces (129 gray plastic & 12 Photo-Etch Brass) |
|
Retail Price |
Approximately $25.75 USD (18.99 Euro) |
|
Reviewer |
Patrick Keenan |
|
Review Date |
First Look: May 17, 2007 (Amended 8/5) Full Build: September 6, 2007 |
Review Summary*
|
Review Type |
Full Build |
|
Basic Positive Features |
First 1/35 Plastic Kit of Vehicle |
|
Basic Negative Features |
Kit only provides basic level of detail; Soft/General Detail of some Individual Pieces. Fit issues at times. |
|
Overall Rating |
3.0 of 5.0 (Amended 8/5/07) |
|
Kit Accuracy Rating |
3.0 (Amended 8/5/07) |
|
Parts Fit Rating |
Not Rated |
|
Parts Casting Quality/ Detail Level Rating |
2.5 |
|
Decals, Marking/ Painting Information Rating |
3.5 |
|
Instructions/Packaging Rating |
3.0 |
|
Recommendation |
Recommended (Amended 8/5/07) |
* For information regarding the review terms, grading scale, etc. please go to the WarWheels Review FAQ/Key
___________________________________________________________________________________________________
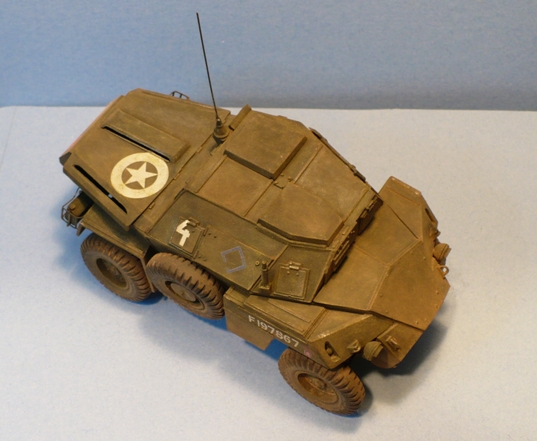
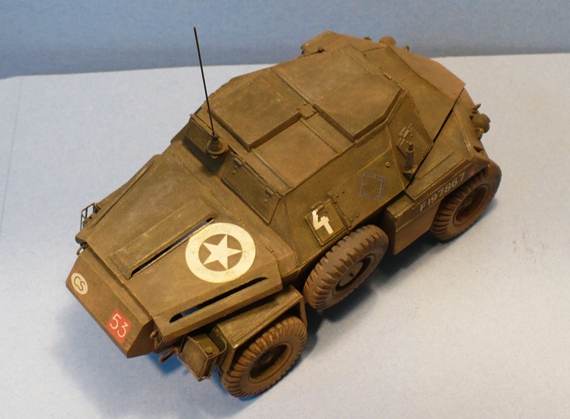
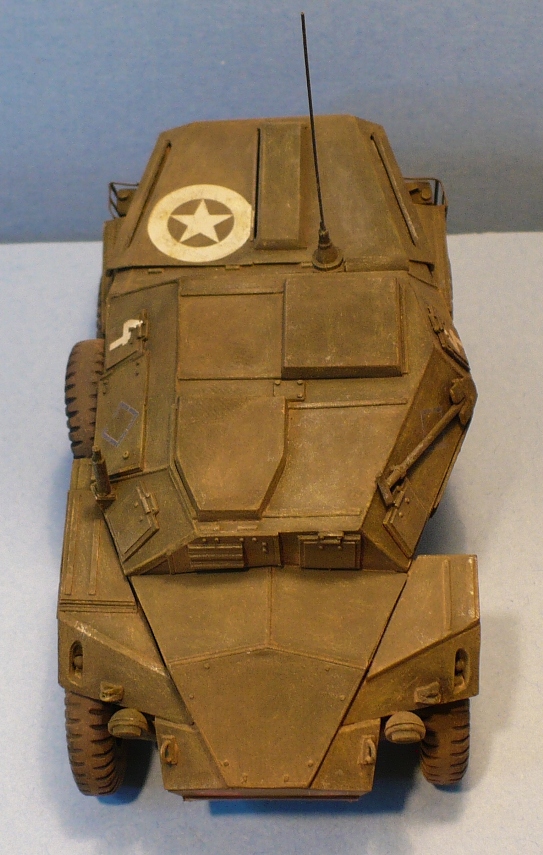
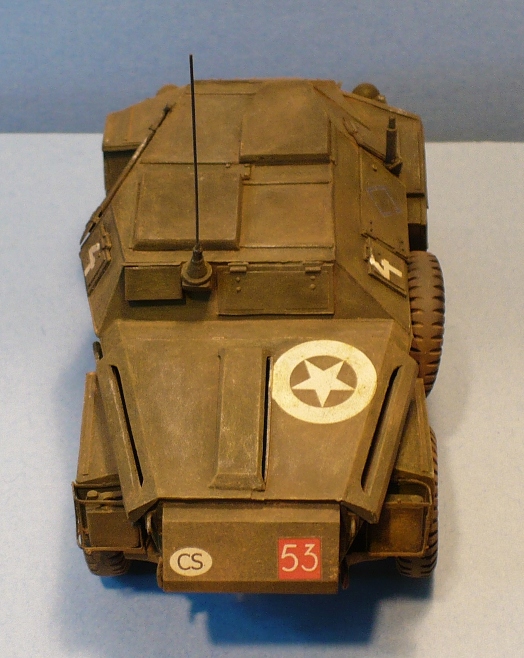
Photos

Detailed Review
|
Background |
|
To be completely honest, when I heard that not one, but two injection molded 1/35 Humber Scout Cars (SC) were to be released this year (SKP & Bronco), I was ecstatic. The Humber SC is probably my favorite wheelie! In fact, so much so that I made the Humber a part of the WarWheels.Net logo!! Ever since I first saw “A Bridge Too Far” and Michael Caine riding in one, I fell in love. I have the Accurate Armour Resin kit to be sure, but that did not temper my enthusiasm as anytime something comes along the pike in the modeling world that is wheeled, armored and in plastic, I get a bit excited. SKP Model is a newer model company from the Czech Republic and this is their first full injection molded plastic kit. In addition, SKP’s Humber SC is the first 1/35 kit of this vehicle as well. Bronco Models has just released their version and I look forward to building that one as well. On to the review. |
|
|
|
Kit Accuracy |
|
When I first saw test shot photos of SKP’s Humber SC on the Internet, my first thought was “that it looked too long in the back end”. However, being that I hadn’t seen it up close and in person at that time, I didn’t want to make any decision one way or another. Now, that I have the kit in my hot little hands, I’ve consulted my references thoroughly, and I’ve built the kit up enough, in my opinion the kit is perfectly fine in dimension. The kit is NOT too long. Please note that at the time of my first writing this review (May 2007) I had believed it was very possible the kit was too long. As of my amended review of August 2007, this is NOT the case. Although I used a bunch of references to check the accuracy of the kit, the main ones I used were Issue # 45 of “Wheels and Tracks: The International Review of Military Vehicles”, 1/35 AFV Drawings by George Bradford (print B38) and my resources located on WarWheels.Net (including George Moore’s wonderful 1/35 plans as well). |
| Fit of Parts |
|
The fit of the kit parts and the ease of construction was decent IF YOU MADE SURE TO DRY FIT PARTS BEFORE GLUING. If not, you are in for a rough ride. I know dry-fitting is something we are supposed to do with EVERY kit, but admittedly I don’t do it as much as I should. In fact, with some kits I never really do it all that much, but I do get by. However, with this kit you NEED TO. In a way, this kit almost reminded me of a resin kit with the amount of dryfitting, trimming, dryfitting, sanding, etc. There were countless times when I needed to sand/trim a part to make it fit properly. I ONCE made the mistake of gluing parts together without giving it a proper test fit and I paid the price; The resultant extra effort/time to fix the mess I made. For the love of all that is good in the world, PLEASE dry fit the parts of this kit before gluing. Although there are a lot of fit issues and places where you need to be careful, some of the things you REALLY need to be aware of when completing this model are: · In Step #1 part B1 (rear end) is pretty hard to fit. Take your time as it can negatively impact the construction of the rest of the kit. If the back is off, the entire kit alignment can be off; · In Steps #7 and 8 when working on the suspension, make sure you pay extra attention when building up this portion. Double and triple check the placement of components as this is a critical point of the kit build. This is when a good reference collection helped me quite a bit as some things in the instructions aren’t as clear as should be in a perfect world. · In Step #16, the construction of the wheels was the most time consuming part of the entire kit build. The lack of locating pins makes this step extremely difficult to perfect. I ended up mis-aligning 2 of the 5 wheels (including the spare) and I paid the price of having to fill these with a lot of putty and sanding until my hands were raw. Well, not raw, but my nerves were shot. Unfortunately I had no choice but to suck it up and work on the wheels extensively as if the wheels are off, the entire kit would look bad. Even though I did a decent job on the other 3 wheels I still needed to fill and sand these a bit anyway. Finally, these last two comments do not directly relate to the fit of parts/ease of construction rating but did ultimately affect those aspects of the kit. One of the weirdest aspects of this kit is the fact that there are no part numbers for any of the kit pieces which are located on the sprues. This fact in its own right isn’t weird as Italeri had done this in the past I believe, but it is weird for a kit developed in 2007. You have to reference the instructions to find the specific pieces you’ll need for each step. Of course this isn’t something any modeler can’t do, but it unnecessarily lengthens the time it takes to complete the kit. I can’t even count how many times I had to go back to the kit diagram to figure out which pieces I needed for specific construction steps. Also, there are NO locating pins or holes either on any of the kit pieces. Although the instructions are decent enough, there is much guess work as to what goes where. Again, I almost felt like I was working on a resin kit. Again, these are not major problems to me. Unfortunately, they are more examples of negative aspects of this kit which made it harder to construct than it had to be. |
|
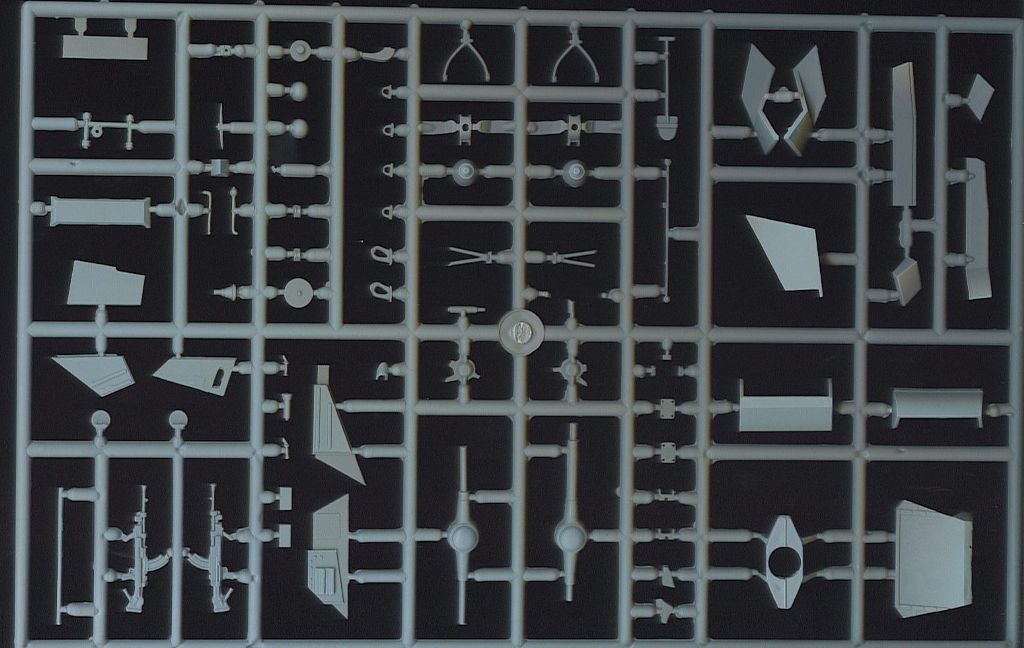
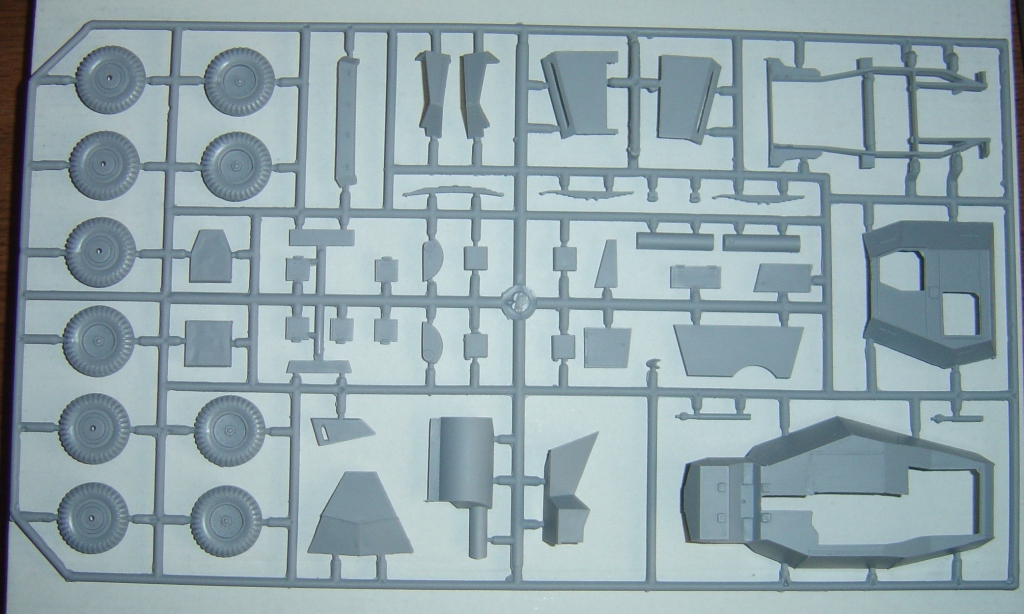
Quality of Casting/ Detail Level of Parts |
|
The kit pieces in general are much thicker than most kits produced in this modeling era. Also, the sprues themselves are massively thick and thusly the attachment points from the sprues to the pieces are pretty substantial as well. Most of the time it doesn’t make things too difficult, but at other times it really makes things a lot harder than necessary. Case in point; the armored vision plates are attached to the sprue right at the edge of the plates. Once removed, you have this very thin armored plate with a plastic nub to remove which is about 4 times as thick as the part itself. The quality of the casting of the kit pieces is decent to good. There is flash present on some of the parts, and some minor mold seams to scrape. Nothing too bad though. There are not too many sink holes, but in my opinion, there are too many for a kit produced in 2007. The worst part of the molding is that there are sink holes on a few of the tires right next to the wheel rims. The placement of the sink holes there will be more difficult to fix than if they were to occur somewhere else. Again, no major problem but annoying to me for a “newer” kit. The detail level of each individual part is fair to decent. It appears that all the parts are there and the basic shapes look good, but they are very light on the detail level. The same point goes for the overall detail level of the kit after I had constructed the Humber. The entire thing looks “soft” in detail and pretty basic. My same “detail” comments also apply to the photo-etched parts SKP provides as well, but they are a bit better in that aspect than to the plastic parts. |
| Decals, Marking Information and Painting Information |
|
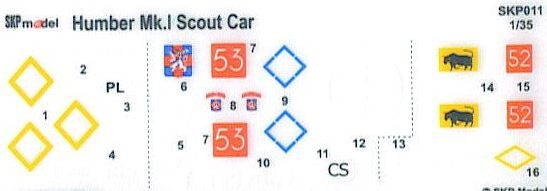
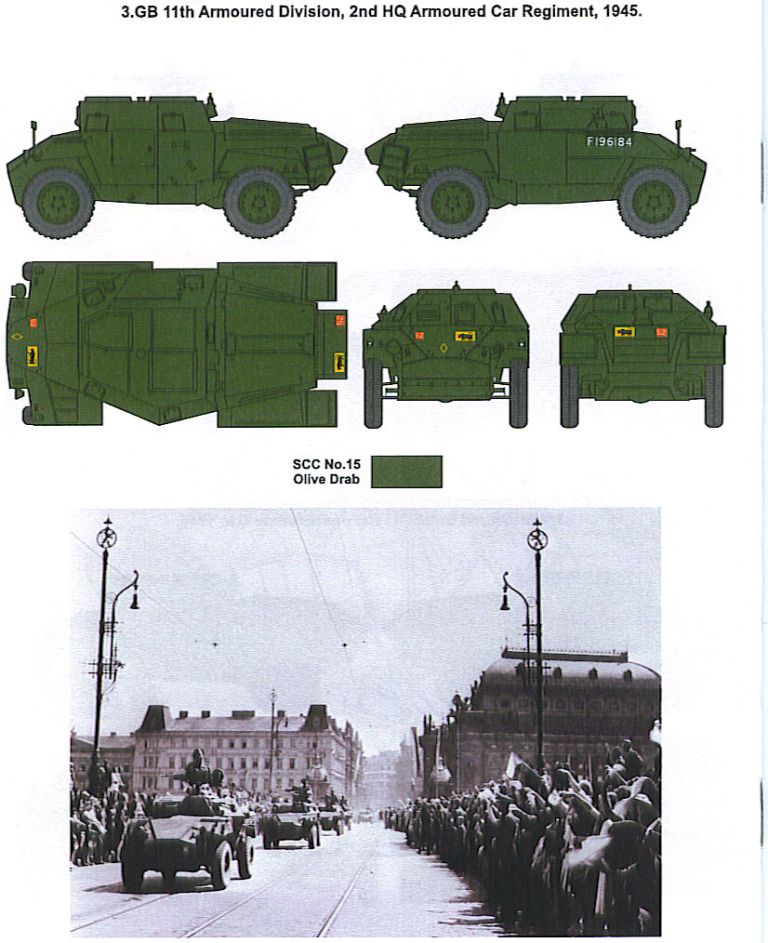
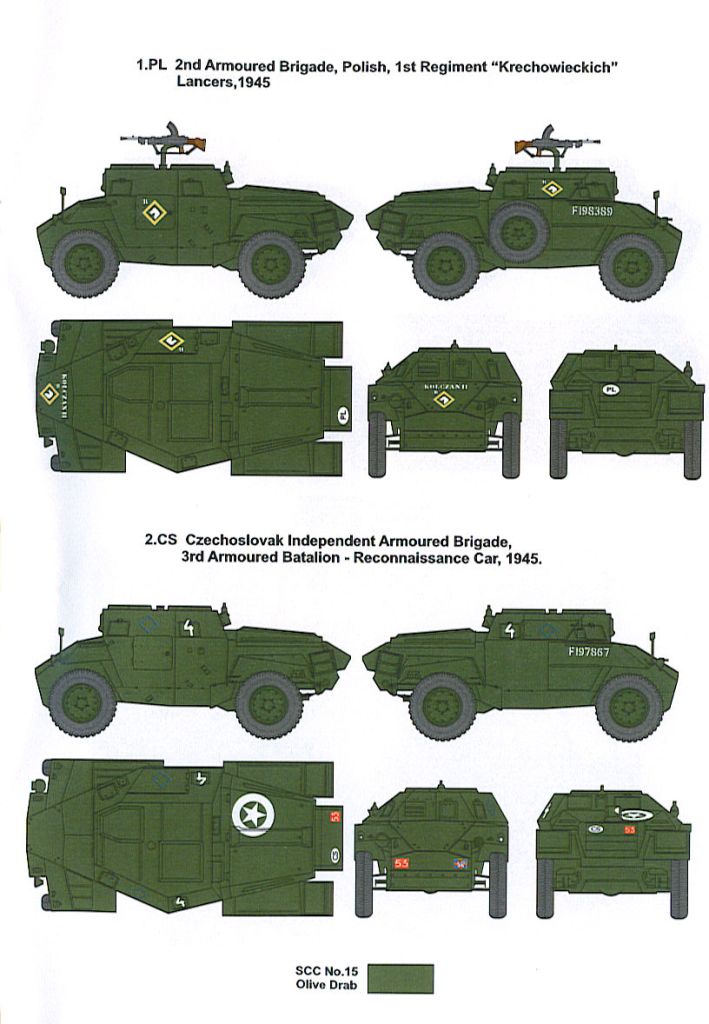
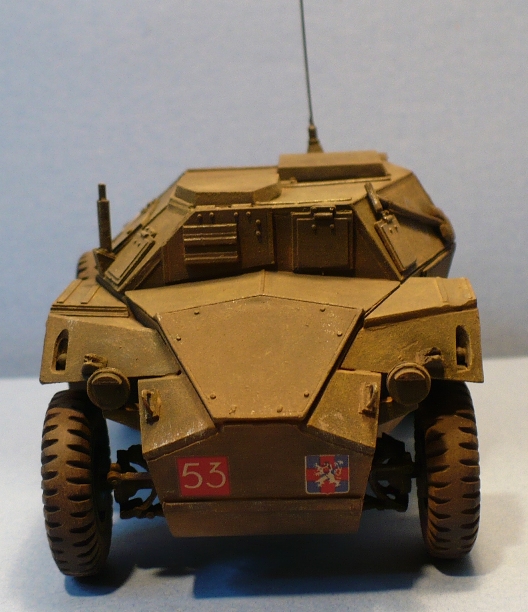
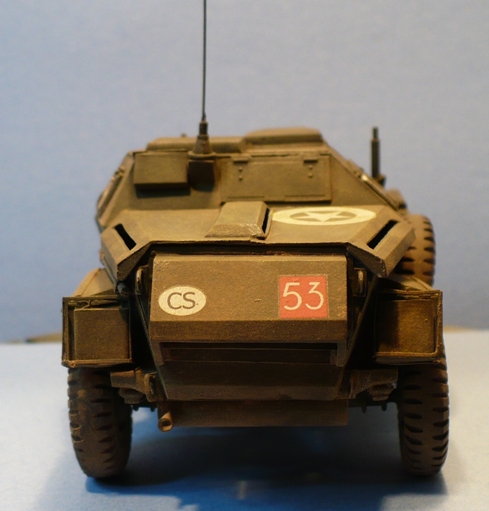
The decals SKP provides are not traditional water slide markings. They are dry-transfer or “rub on”. The transfers are printed in register with bright color. Although they look good on the sheet, I am disappointed to say that they don’t work as well as they look. First of all, some of the transfers came off with a slight silvering or semi-transparent edging. One of the normal advantages of using dry transfers over water slide decals is that usually the markings come off without any edging. Second, the star-in-circle aerial recognition roundel transfer cracked when I applied it over a slightly uneven surface. In my opinion, this shouldn’t have happened as the surface wasn’t that awkward and should have applied with a minimum of effort. Three marking options are provided and if I do so myself, I like the eclectic choices. They are: · 2nd Armored Brigade, 1st Polish Regiment “Krechowieckich” Lancers (1945) · Czechoslovak Independent Armored Brigade, 3rd Armored Battalion (1945) · British 11th Armored Division, 2nd HQ Armored Car Regiment (1945) The painting & marking guides are one in the same and printed in color. Five views of each vehicle are used to show where the markings are to be located. The guide is also very understandable and can be easily followed. All three vehicles are to be painted in Olive Drab, so no difficulties following the painting directions should occur. |
| Instructions/Packaging |
|
SKP provides their instructions in the form of a 6” x 8 ¼” sized booklet. The instructions are set up in 16 steps on 9 pages and are printed in full color. Their design and look are reminiscent of instructions provided by Eduard. The instructions seem decent enough standing on their own accord. However, coupled with the fact that the kit parts do not have locating pins or holes, the instructions really needed to be better. Thank goodness I have a good chunk of resources on the Humber. I certainly needed them at times. Although a good reference collection is not necessary, they are quite helpful. The packaging SKP provides is decent enough. Not great, but not bad either. The kit should be protected during it’s transportation to your favorite brick/mortar or online hobby shops. That is, unless some beastly handling by your respective Postal Service happens. They also bagged the two sprues separately but the decals and PE are packaged together, although this shouldn’t be a problem. To make a long story short, SKP provides a good box that should protect it from most normal problems encountered by our model kits, short of abusive/neglectful handling or nuclear war. |
| Finishing the Model |
|
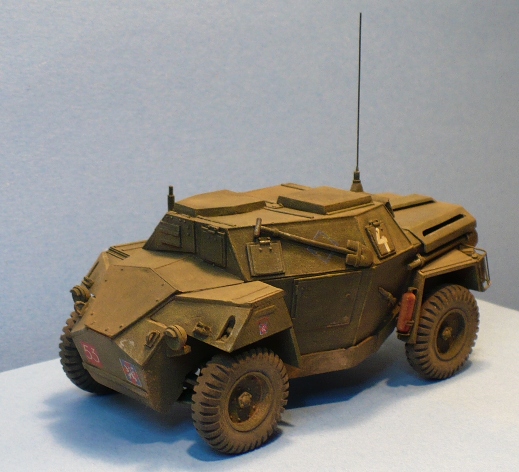
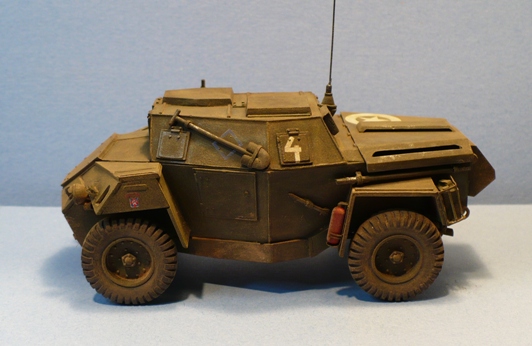
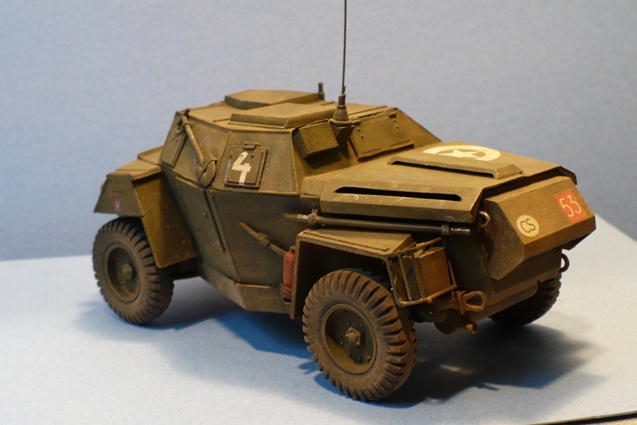
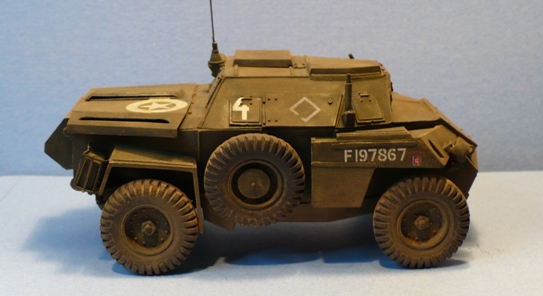
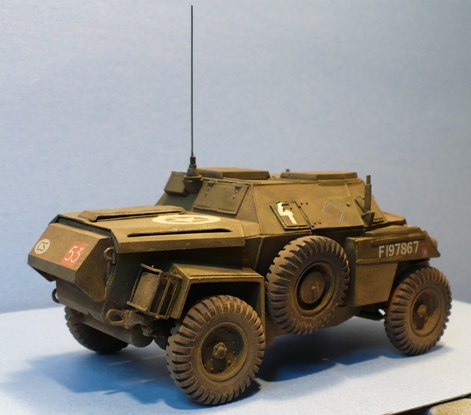
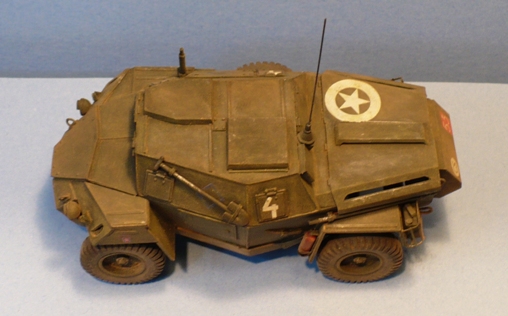
I painted the entire model in Tamiya “Dark Green” (XF-61) except for some of the detail pieces. I painted the tires in Tamiya “German Grey” (XF-63). For weathering, I then dry brushed the kit with Tamiya “Buff” (XF-57) and Testor’s Model Master Aluminum. As a final weathering touch, I used MIG Productions (A sponsor of WarWheels) Pigments -“Europe Dust” (P028). Finally I marked this vehicle as one used in the Czechoslovak Independent Armored Brigade, 3rd Armored Battalion. |
| Conclusion |
|
For their first 1/35 plastic model kit, I think SKP has done okay and with the Humber SC they definitely show promise. However, the kit’s overall detail level is pretty basic and it could use more petite/delicate detailing of the individual parts as well. They’re kind of “clunky”. The fit of the kit parts was decent if you test fit them before gluing them together. If you try to get by without doing this step, you’ll be in for a world of hurt and unpleasantness. There are also many little issues with the kit design that could be improved upon to make building the kit easier and/or enjoyable. However, with all this being said, I am actually happy with the look of my finished model. It isn’t as detailed as I’d like it to be, but the shape and size are perfectly fine if you want a decent representation of a Humber Scout Car in your built model collection. The good news is that many of the “issues” with this kit can be rectified with later kit releases. The negative aspects have more to do with the lack of experience a company has in engineering model kits, rather than due to bad quality products. Hopefully they can improve upon this kit with future releases as I do like SKP’s present catalog of products and I look forward to more products from SKP. Finally, despite all the griping I did, I am actually fairly happy how this kit came out when done; especially considering the difficulties I sometimes had when constructing it. I can only think how happy I would have been had the kit been a bit easier to work with at times. Thanks to SKP Models and IPMS/USA for the review sample. Recommended |
| Copyright: Patrick Keenan - May 17, 2007 |